1. Fix a Disabled iPod touch via iCloud
This is the method you should use when you don’t have access to your iTunes. This method will reset your iPod touch if Find My iPod was enabled in iCloud and your iPod was registered with your Apple ID before it got disabled. You will need a working wireless network for this to work.
Follow these instructions to fix your disabled iPod touch:
Step 1. Use any other device (iDevice, Phone, Mac, Windows PC, etc.) and visit icloud.com/#find via a web browser. You can also use Find My iPhone app on any iDevice for this purpose.
Step 2. Log in with the same Apple ID that is associated with your disabled iPod touch.

Step 3. After successfully logging in, navigate to All Devices section and find and select your iPod touch from the list.

Step 4. Now click the Erase iPod and then confirm your action to proceed. The reset process will begin.

3. Reset a Disabled iPod touch with iTunes
If you have access to your computer, then it is recommended that you use this method to reset a disabled iPod touch and fix the problem. Here is steps on “iPod touch Disabled” fix:
Step 1. Connect your disabled iPod touch to your computer. Then launch iTunes and select your iPod touch.
Step 2. Now create a backup of your iPod via the ‘Back Up Now’ option. When creating a local backup, make sure that ‘This Computer’ is selected. This is an essential step if you want to restore your data after resetting the iPod.
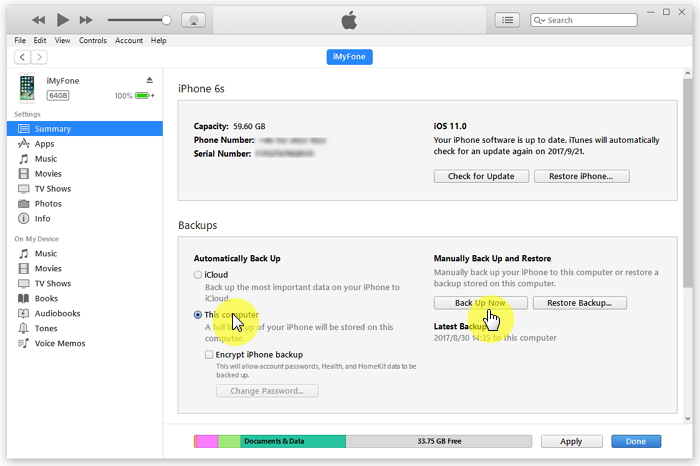
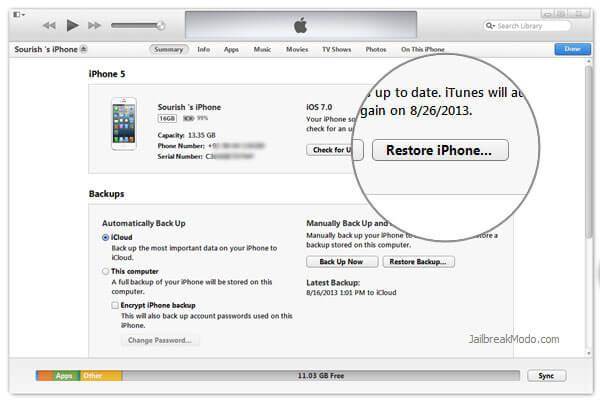
Step 3. Once the backup process is finished, click the ‘Restore iPod’ option to start the reset process.
Also Read:
iPhone Could Not be Restored Can be Easily Solved >>
Easily Fix “iTunes Was Not Installed Correctly Error 7” >>
4. iPod touch is Disabled? Fix This in DFU Mode
If none of the above mentioned methods worked, then you should give this method a try. DFU mode is just like the Recovery Mode of an iDevice. A lot of users claimed to have succeeded with this method when other methods failed. You will need to have iTunes installed on your computer for this method to work. However, your disabled iPod touch does not need to be synced with iTunes.
Follow these instructions to fix “iPod touch Disabled” issue:
Step 1. Turn off your iPod touch by using the Power button and sliding the Power slider when it is prompted.

Step 2. Connect the iPod touch to your computer when it is completely off and launch iTunes.
Step 3. Now press the Power button and Home button and hold them for a few seconds until iTunes reports that it has detected your iPod touch in Recovery mode.

Step 4. Now click the Restore option to start the restore process. The restore process may take some time to complete.Also Read:Create Boomerang from Existing Videos on Android/iPhone 2019
Also Read:Rotate Video on Facebook 2019

Step 5. Once the process is completed, you will need to set up your iPod touch. When setting it up, you can use the backup (if it exists) to restore your data. If there is no backup, then all your existing data will be lost.


No comments:
Post a Comment